
There are many ways to get those stitches started on the needles, and which method you choose will be dependent on the project you are casting on and the finish you want to achieve - whether it be firm, stretchy, decorative, provisional etc.
The Long Tail and the Knitted cast on's are common basic methods, popular due to their versatility. If you are an absolute beginner I would recommend starting with the knitted cast on.
Long Tail Cast On
Knitted Cast On
Garter Tab Cast On - a common cast on for shawls
Provisional Cast-on using a Crochet Hool
Long Tail Cast On
A great all-rounder of a cast-on. This method produces a nice neat and stretchy edge and is suitable for most projects.
1. Measure out a tail of yarn long enough to cast on the amount of stitches required. As a general guide before you start you can wrap the yarn around the needle once for each stitch you need to cast on, unwrap the yarn and add a little extra before casting on.
2. Make a slip knot and place it on the needle in your right hand, use your index finger to prevent it from slipping. this will count as your first stitch. Keep the long tail of the yarn in front and the working yarn at the back.
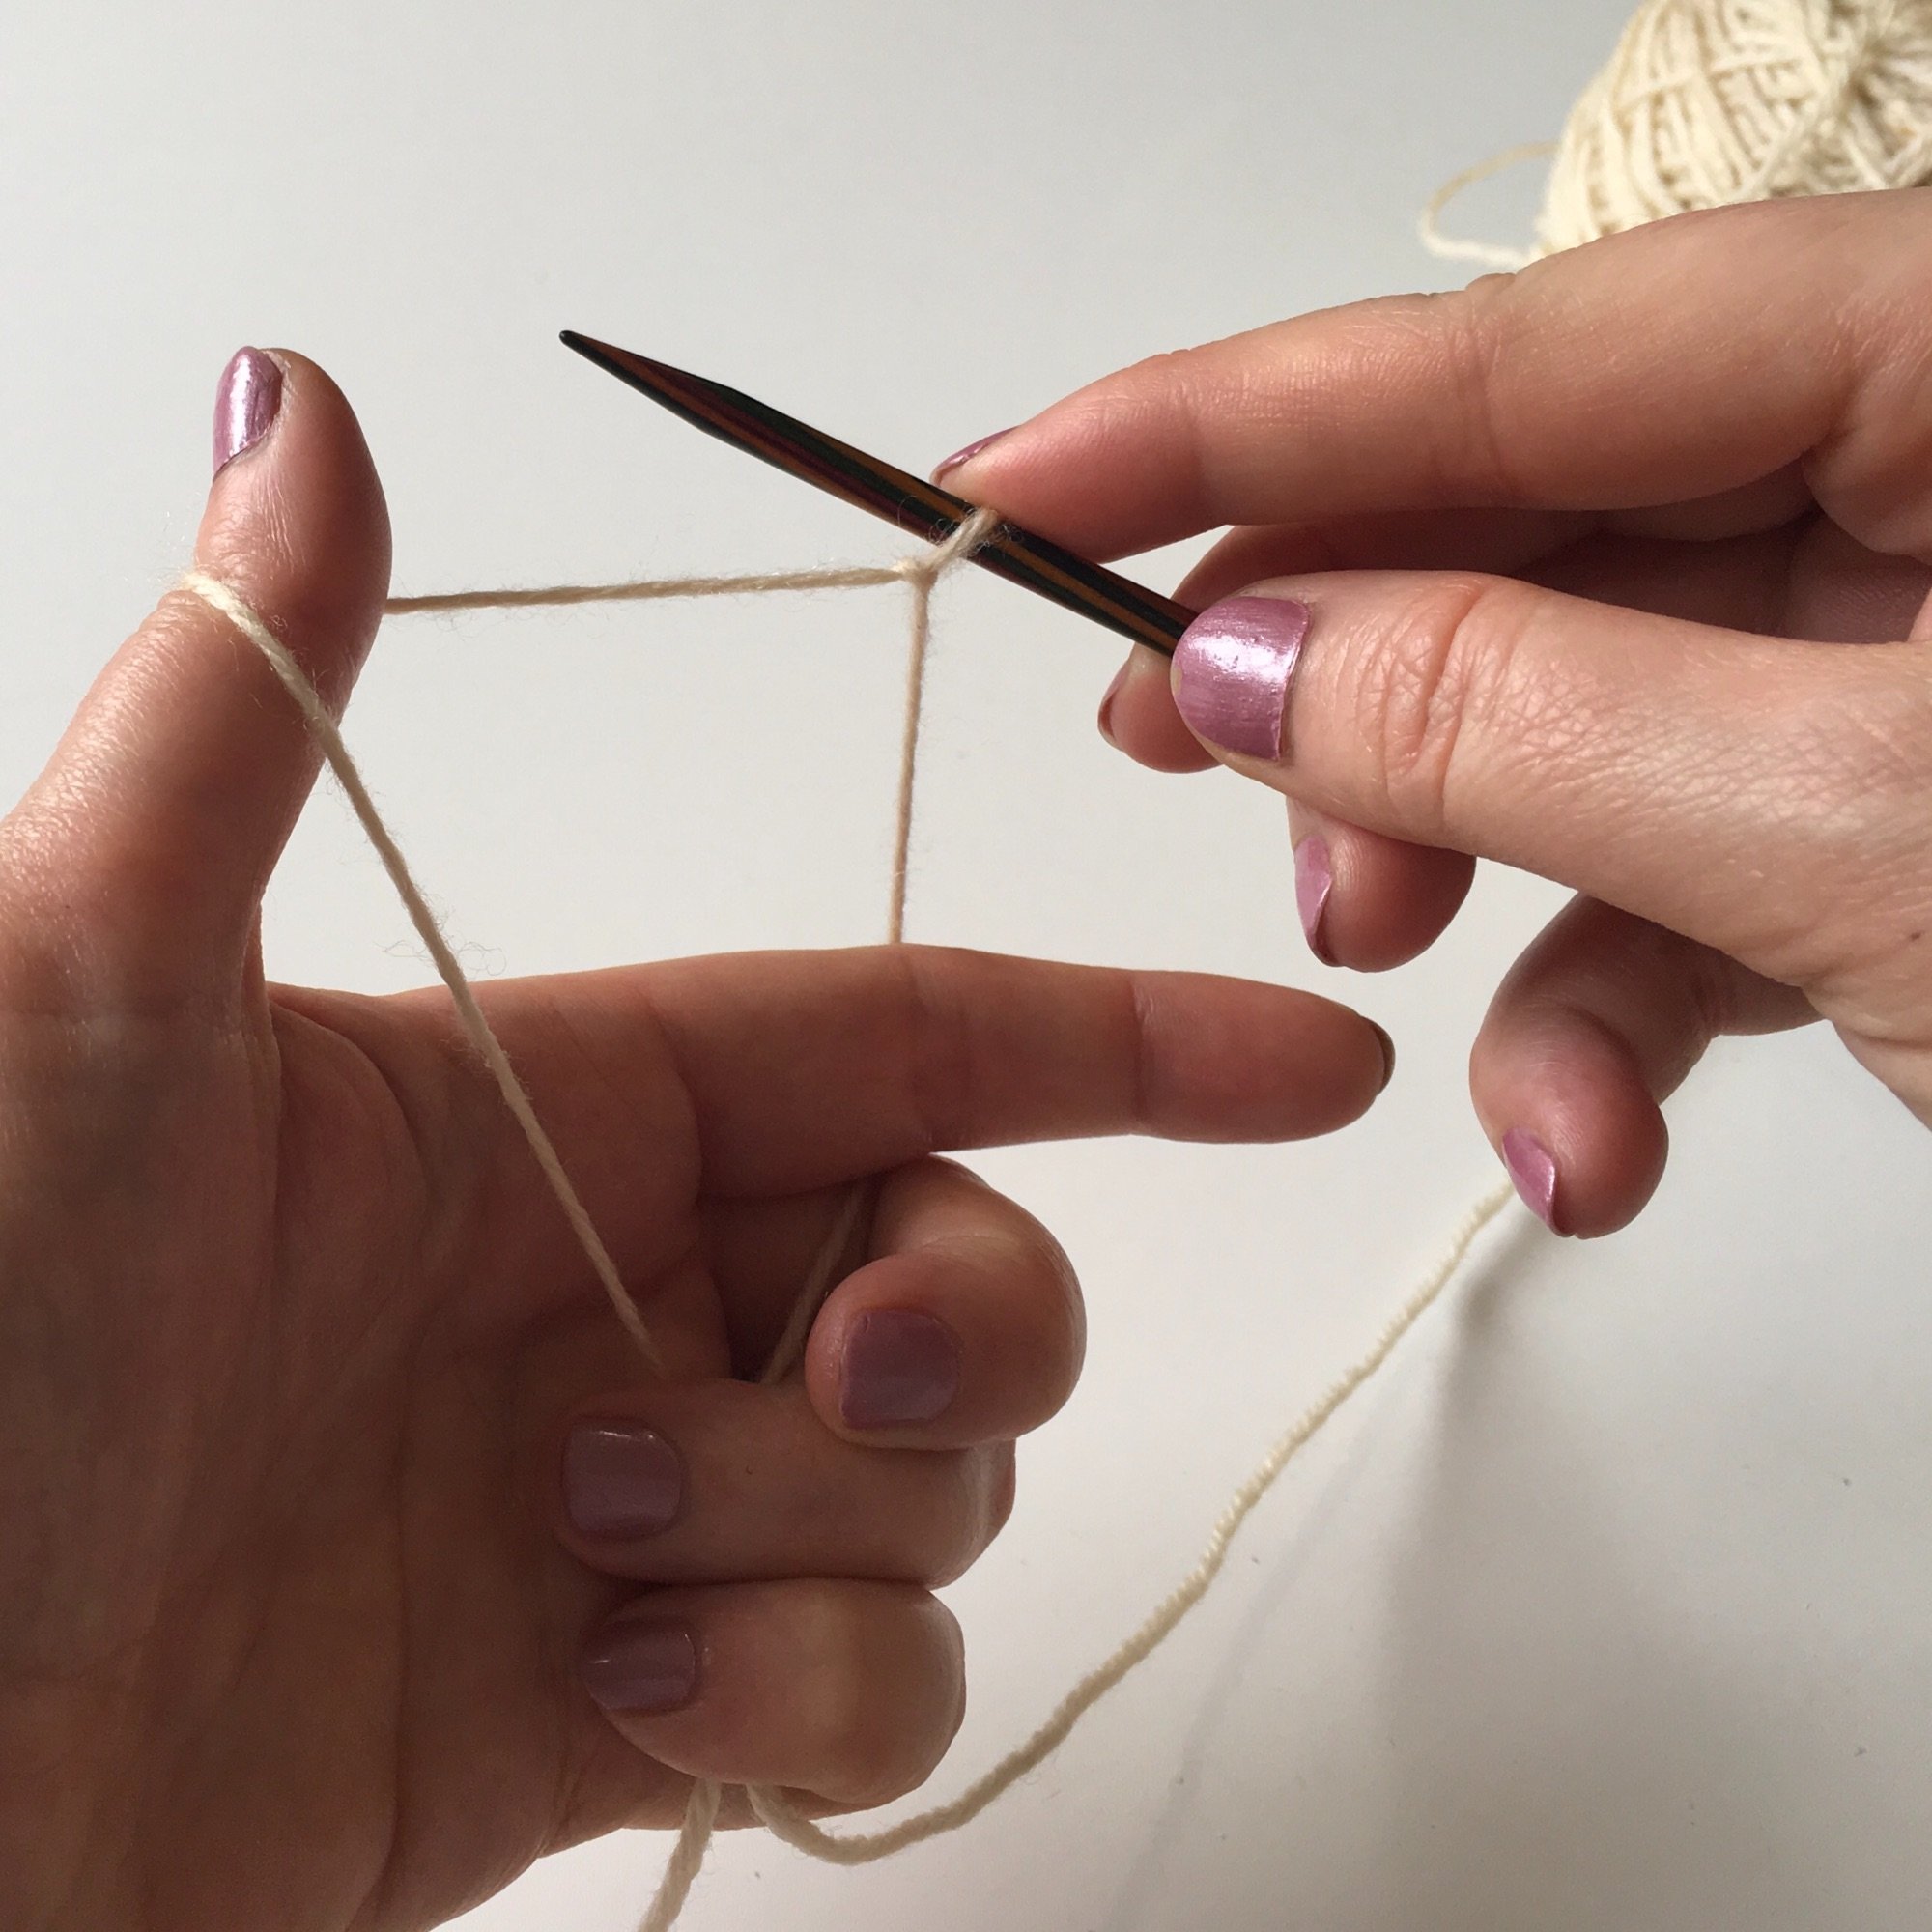
3. Create a slingshot with your left hand by wrapping the ball end of the yarn around your index finger and the tail end over your thumb. Catch both ends of the yarns against the palm of your hand with the rest of your fingers
4. Use the needle to reach under the yarn wrapped round your thumb
5. Take the needle over and down through the yarn on your index finger
6. Bring the needle back through the thumb loop
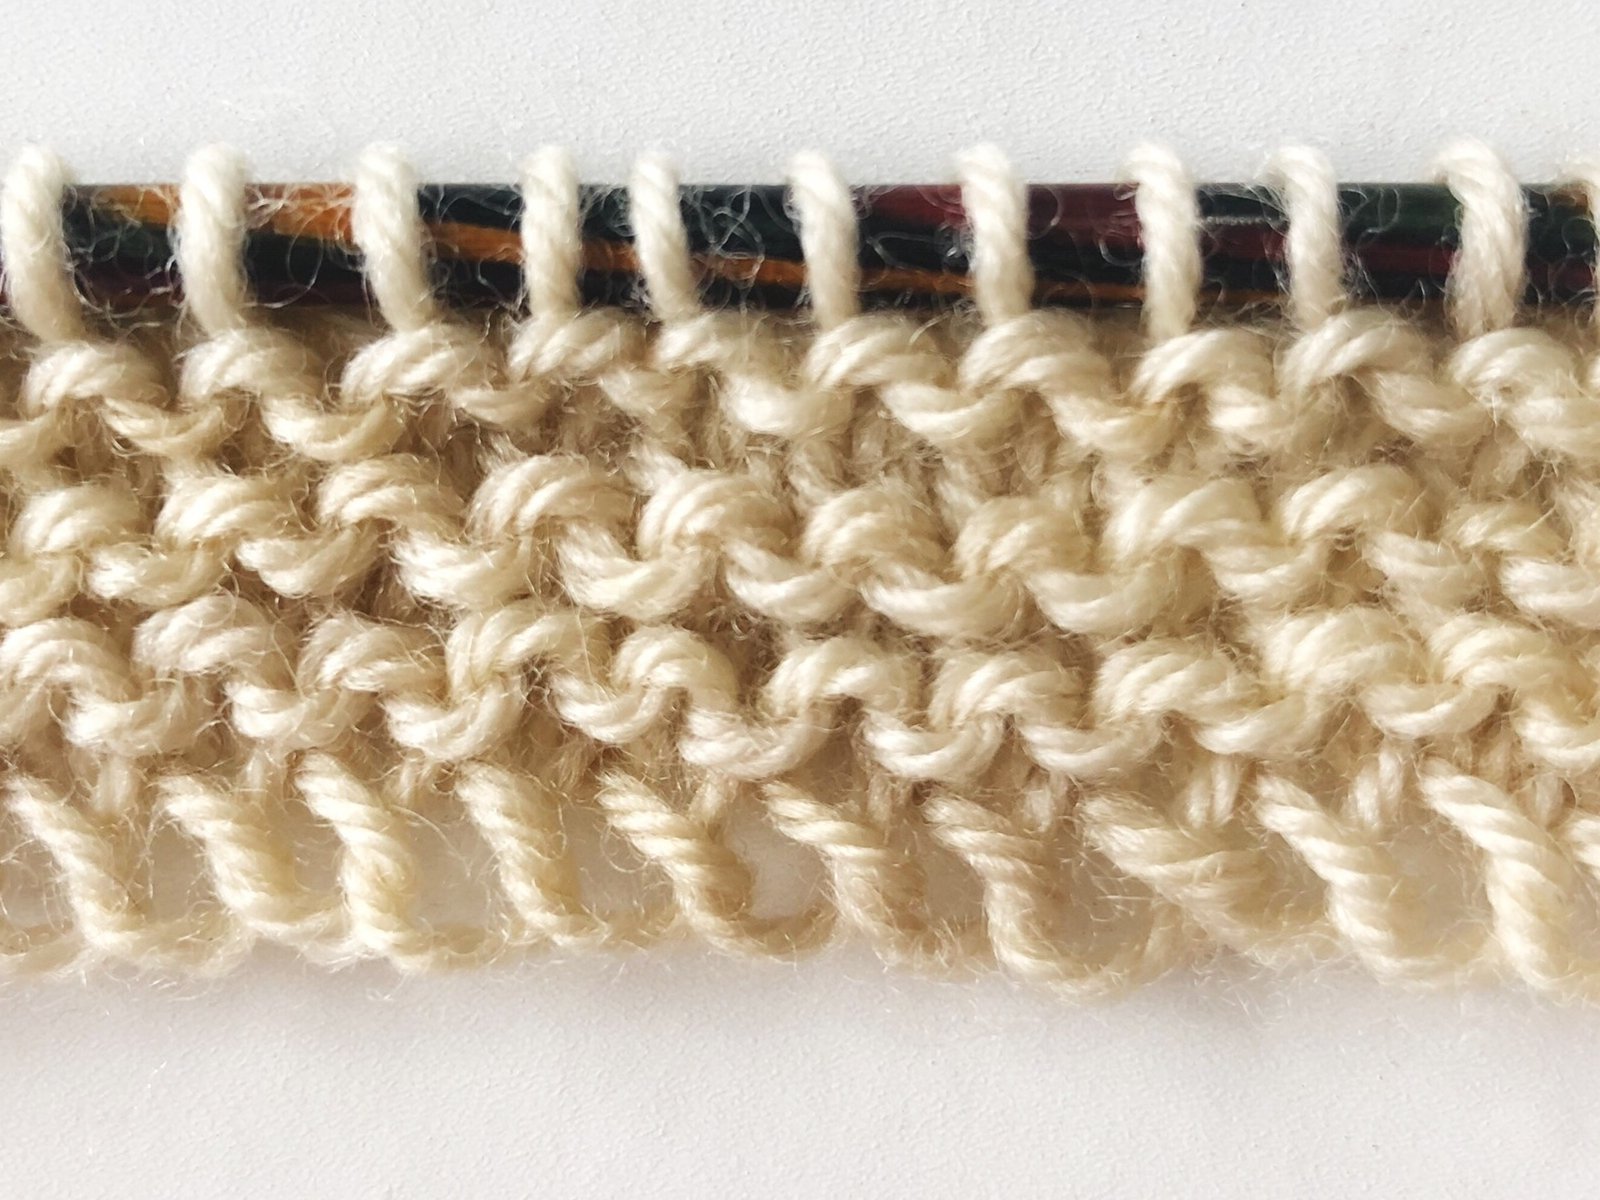
7. Slide the loop from your thumb and gently pull to tighten the stitch around the needle (but don't pull too tight!)
8. Repeat steps 4 - 8 for the required number of stitches
This cast on will create the first row of knitting, so if you are knitting in stockinette you will want to work a purl row next
Knitted Cast On
This cast on is an easy one to learn as it follows the same principles of the knit stitch. It produces an elastic and decorative edge and is a good one for adding stitches at the end of rows too.
1. Leaving a short yarn tail, make a slip knot
2. Insert the left hand needle into the slip knot loop and pull to close
3. Insert the right hand needle into the slip knot
4. Wrap the working yarn around the needle and pull a new stitch through
5. Place the new stitch on to the left hand needle. In this tutorial the stitch is twisted before transferring it as this tightens the stitch and also leaves the working yarn at the right leg of the new stitch. To twist the stitch take the left hand needle under the front leg of the stitch on the right hand needle and bring it up through the middle before slipping it off.
*Insert the right hand needle through the new stitch, wrap the working yarn, pull a new stitch though and place this on the left hand needle* Repeat these instructions until the required amount of stitches are cast on.
You can tighten up these stitches even further by knitting into the back loops on the next row.
Knitted Cast On
This cast on is an easy one to learn as it follows the same principles of the knit stitch. It produces an elastic and decorative edge and is a good one for adding stitches at the end of rows too.
1. Leaving a short yarn tail, make a slip knot
2. Insert the left hand needle into the slip knot loop and pull to close
3. Insert the right hand needle into the slip knot
4. Wrap the working yarn around the needle and pull a new stitch through
Garter Tab Cast On
The garter tab is a common method used for casting on shawls.
Once worked it will form the centre top line of the shawl. Increases are then worked in the pattern to create the shawl shaping
1. Make a slipknot and slide this onto the right hand needle, gently pulling the yarn to tighten
2. Using a long-tail cast on, loosely cast on 3 stitches
Handy tip: at this point I like to thread a piece of scrap yarn through these stitches as it helps when picking them back up at the end
3. Knit 6 rows but do not turn the work after the last row. Turn the work 90 degrees clockwise

4. Pick up and knit 3 stitches in the garter ridges on the edge of the piece (6 sts) Turn the work 90 degrees clockwise
5. Pick up and knit 3 stitches along the cast on edge (9 sts)
If you used the scrap yarn it will be easy to spot the 3 stitches originally cast on. I find it easier to place these stitches on the left hand needle before knitting them, but you can continue to pick up the stitches one by one if preferred
Provisional Cast on using a Crochet Hook
A provisional cast on is a temporary one that you can return to at a later point. It keeps your stitches 'live' so that you can pop them back onto your knitting needle and continue working them when you are ready.
In this video I show you how to work the provisional cast on using a crochet hook, which is a very quick and easy way to do it. The cast on in done using a piece of scrap yarn which can easily be removed. So when you are ready to pick up your stitches, you can slowly remove the scrap yarn and place the live stitches onto your knitting needle as you go.
For this cast on you will need:
Your working knitting needle
A crochet hook in the same or close size
Some scrap yarn
1. Make a slip knot with the scrap yarn and place this on the crochet hook
2. Take your knitting needle and hold it on the left alongside your crochet hook
3. Make sure your working yarn is on your right, bring the yarn behind the needle and back to the front
4. Catch the yarn with the crochet hook and pull the yarn through the loop on the crochet hook. You now have your first stitch on the needle.
5. Take the yarn behind the needle and back to the front
6. Catch it with your crochet hook and draw the yarn through the loop on the hook.
Repeat steps 5 and 6 until you have the required number of stitches on your needle for your cast-on.
Work a few chains from the crochet hook so that the end does not come unravelled. Break the yarn and pull it through the last chain to close. You can now join your main yarn and knit into those stitches to start your project.
When you are ready to return to your stitches. Unpick the last stitch from the crochet chain and unzip to the live stitches. Pull the scrap yarn out from each of the stitches one-by-one and place onto your knitting needle.